Getting Started
Charging Devices
Charge your TYPE-S, and LEOMO Motion Sensors (optional) if you will use ones.
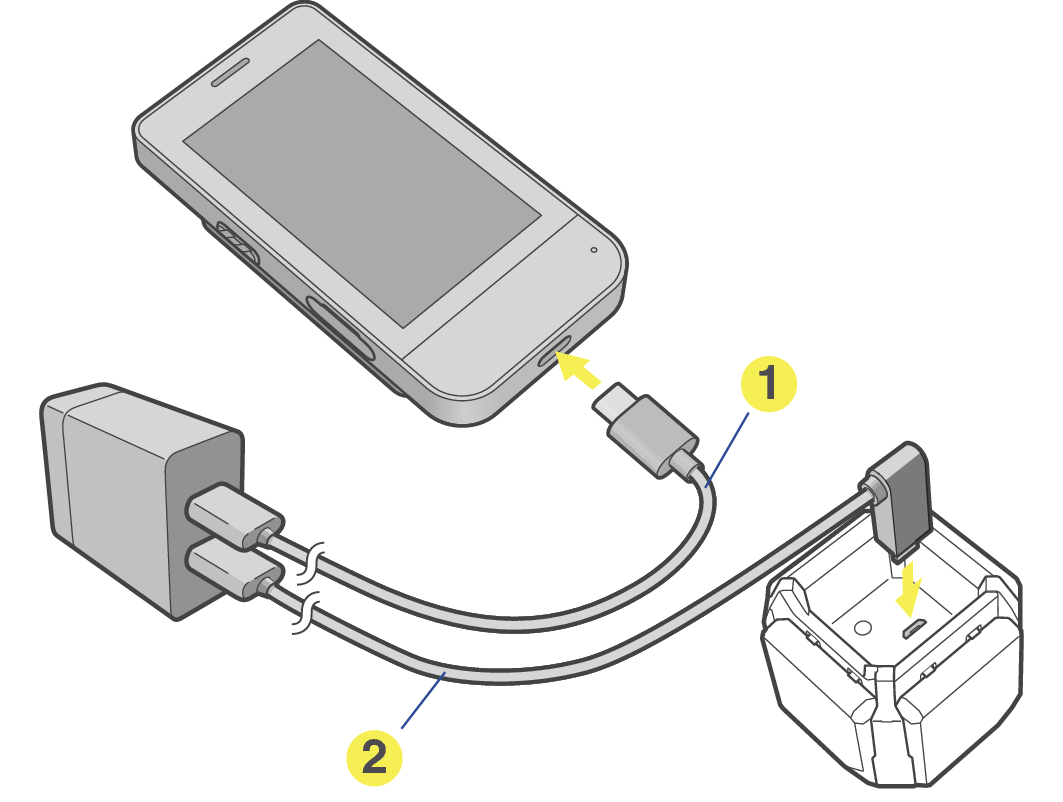
TYPE-S
AC Adapter (optional)
LEOMO Motion Sensors (Up to 5) in Sensor Charger (optional)
-
USB type-C cable (optional)
-
USB cable (optional)
An AC adapter that outputs 5 VDC, 1.5 A or higher must be used for charging the TYPE-S and LEOMO Motion Sensors.
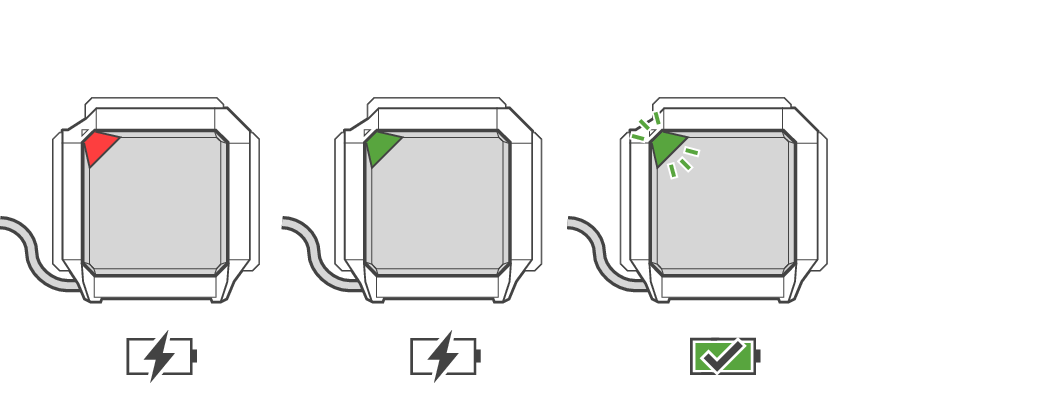
Charging Indications of the LEOMO Motion Sensors
Charging (0-20%): Red LED
Charging (20% - 100%): Green LED
Finished Charging: Blinking green LED
When the LEOMO Motion Sensors are connected to the TYPE-S, their assigned location color will take precedent over their charging color.
Using an Optional Power Mount
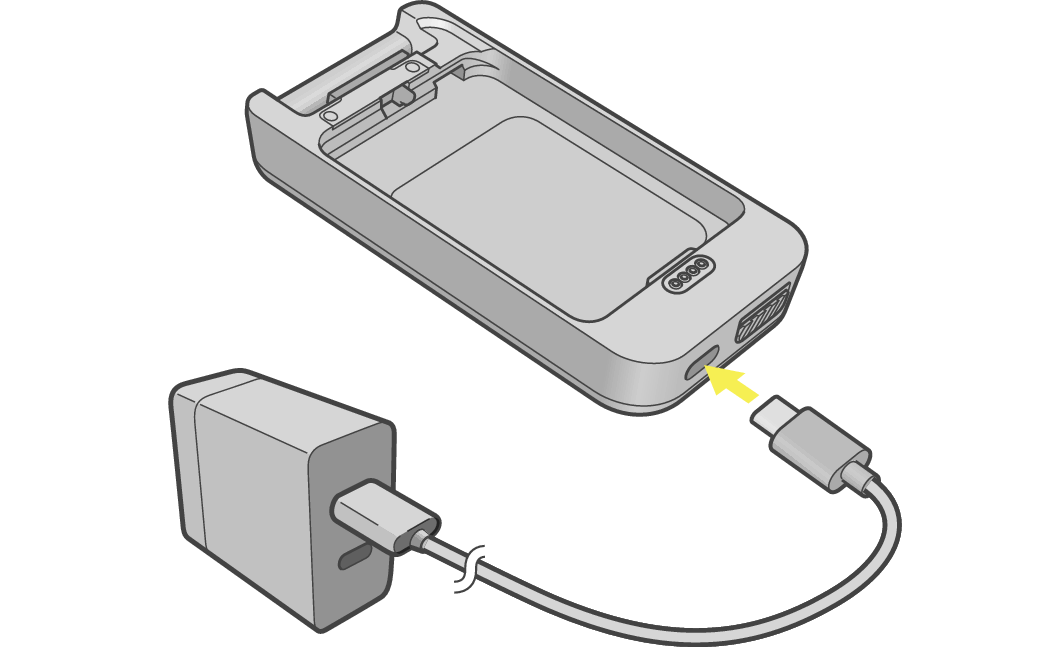
Charge the Power Mount using a USB type-C cable (optional).
To charge the TYPE-S and Power Mount simultaneously, attach the TYPE-S to the Power Mount, and connect the USB type-C cable to the connector on the Power Mount.
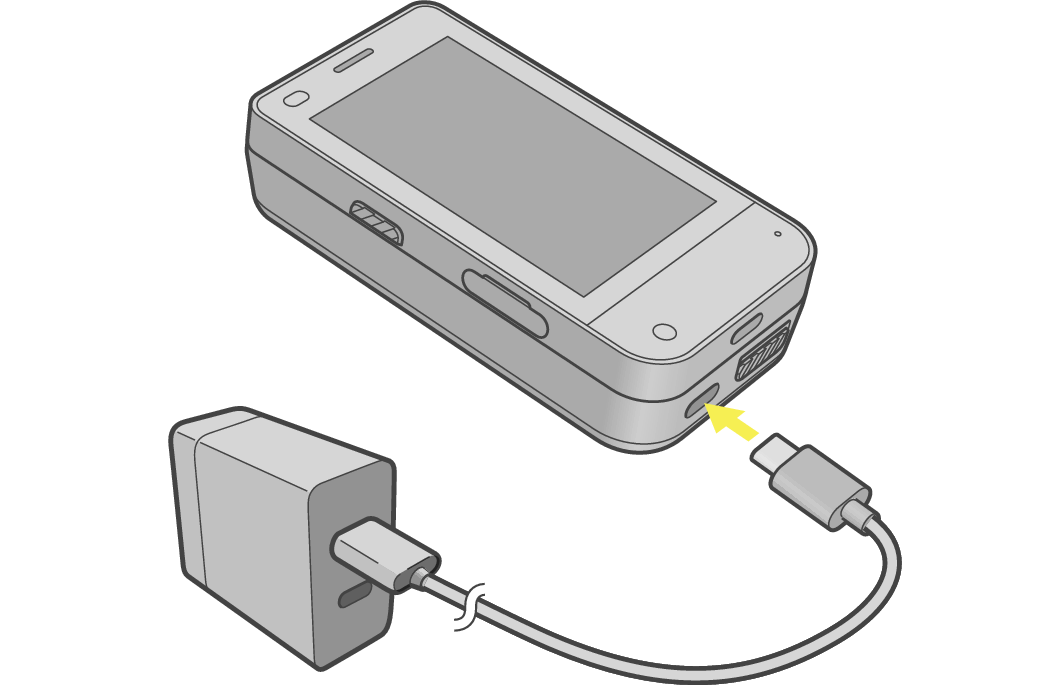
Using the Button on the Power Mount
Pressing the button on the right of the USB Type-C port shows the battery level of the Power Mount.
Pressing and holding this button while charging the TYPE-S stops charging. Press the button again to resume charging.
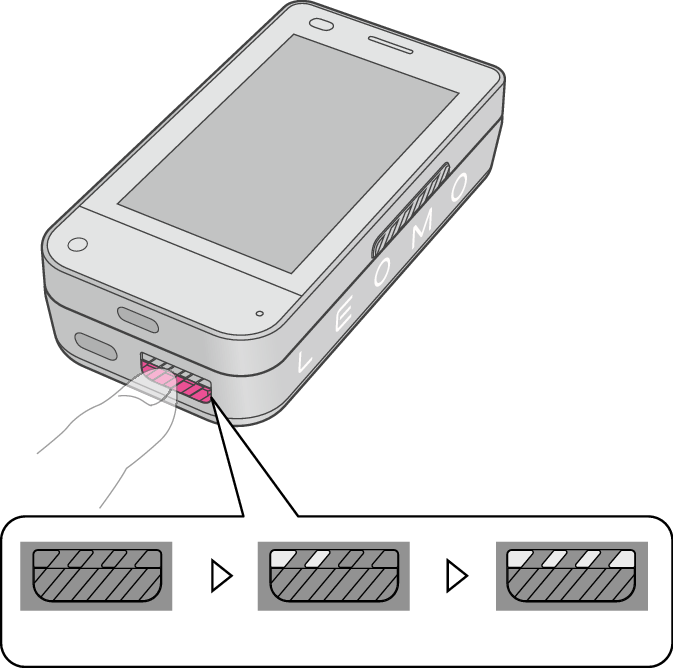
Empty
Full
Turning the TYPE-S On
-
Turn on the TYPE-S by holding down the power key on the left side of the TYPE-S until it powers on.
-
When you use the TYPE-S first time after purchase, follow the instructions displayed on the screen to make the initial settings.
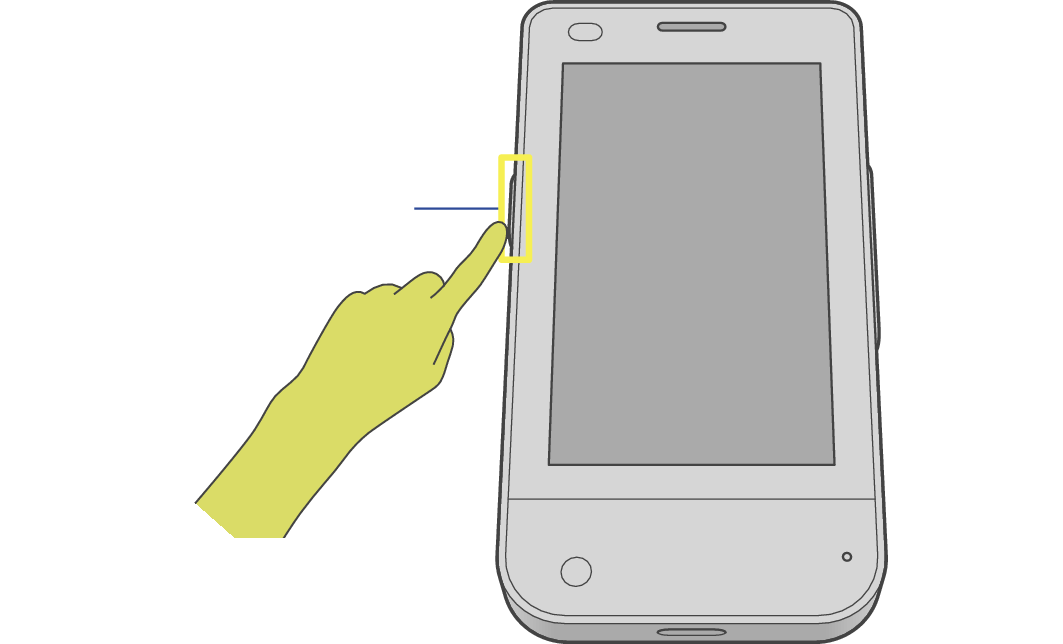
Power key
For details, see “Making the Initial Settings” below.
When the initial settings have already been done, swipe up from the bottom of the screen for PIN entering, enter the PIN that you have registered during initial setting, then tap the check mark.
The home screen appears.
Making the Initial Settings
When the TYPE-S is first powered on after purchase, it shows a message asking if you will use a SIM.
-
Insert a SIM.
-
Make Android configurations.
To use communication functions of the TYPE-S outside Wi-Fi coverage areas, obtain a nano SIM and insert it in the TYPE-S nano SIM/memory card slot.
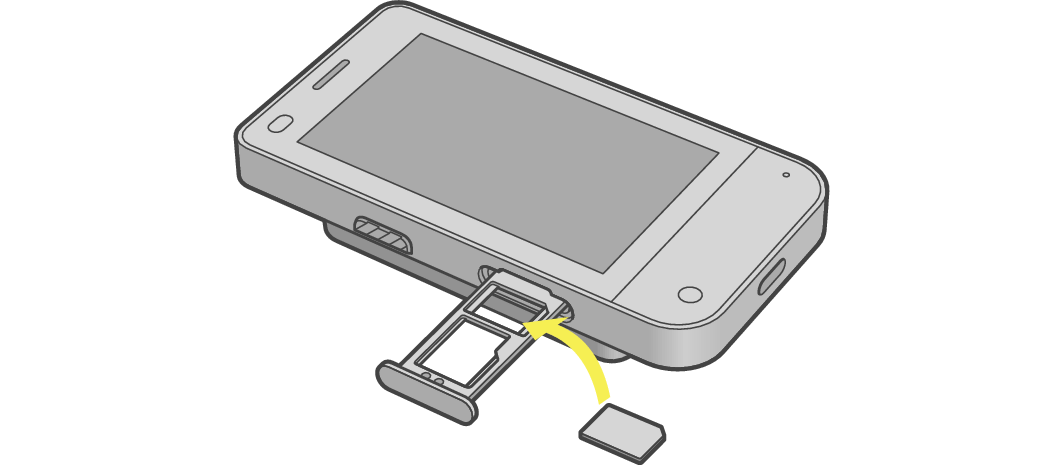
Skip this step if you will not use a SIM.
Follow the instructions displayed on the screen to make the required Android configurations related to Wi-Fi connection, Android, and the GoogleTM account to be used.
The home screen appears.
TYPE-S Home Screen
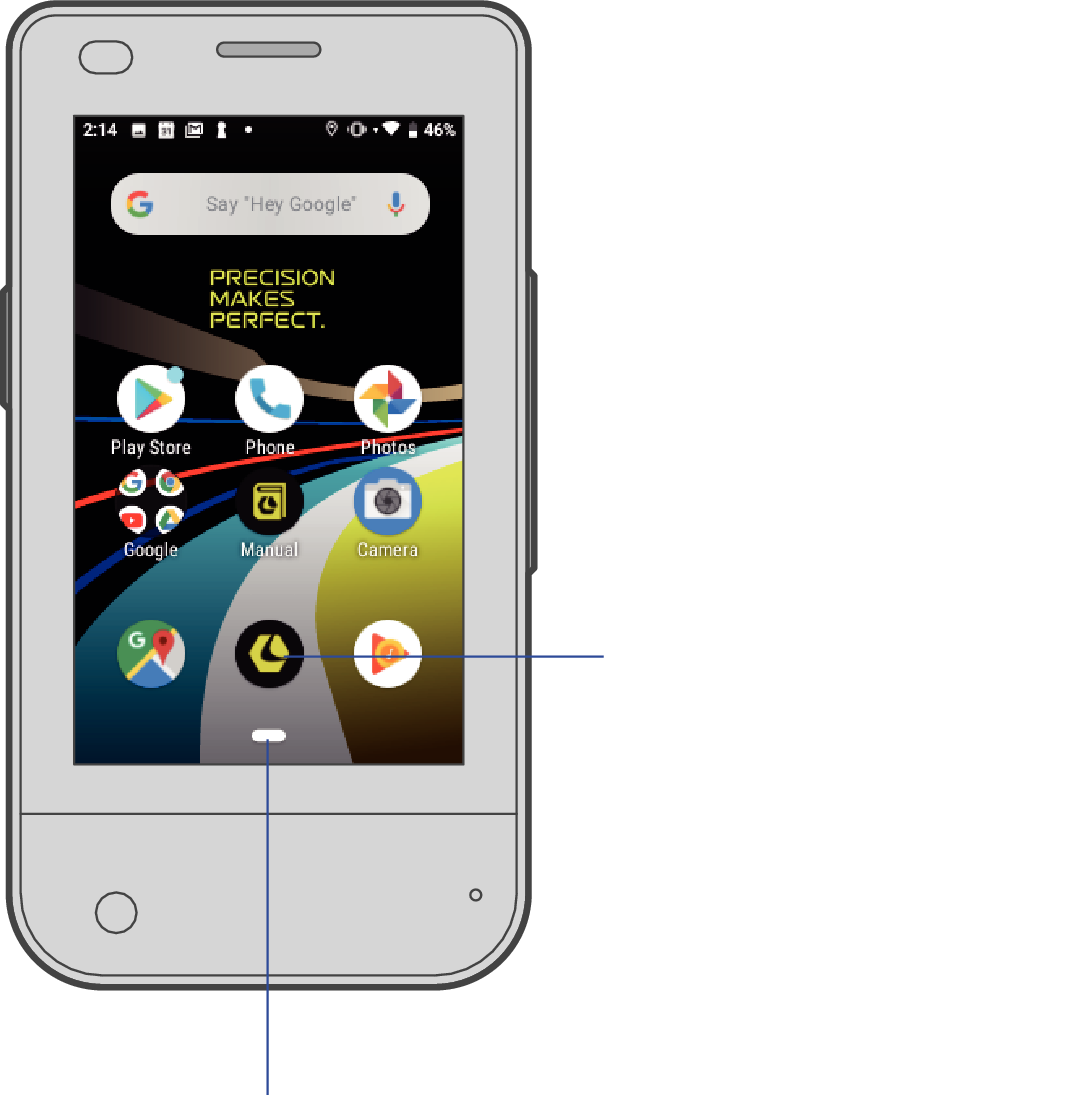
LEOMO App icon
Home button
The TYPE-S is a device having the preinstalled LEOMO App. It can also be used as an Android smartphone.
There is usually one pill-shaped home button at the bottom of the screen, and the back button is also shown when necessary.
The back button takes you back one step or one screen, and the home button always shows the TYPE-S home screen. Swipe right on the home button and hold to view all the currently running apps. Scroll between apps by swiping slowly right or left, and release to open the center app.
The LEOMO App icon is used to start the LEOMO App. Tap the icon to start the LEOMO App.
Using the Android 9’s Three Navigation Buttons
The TYPE-S uses Android 9, you can select the three-button navigation system instead of the gesture navigation system, as follows.
-
Swipe up from the bottom at the home screen.
-
Scroll down to find and tap the Settings icon.
-
Proceed to System > Gestures > Swipe up on Home button.
-
Turn it off.
The three navigation buttons appear at the bottom of the screen.
Using the Magnification Feature
The Android 9 provides screen magnification feature. You can enable it as follows.
-
Swipe up from the bottom at the home screen.
-
Scroll down to find and tap the Settings icon.
-
Proceed to Accessibility > Magnification > Magnify with triple-tap.
-
Turn it on.
Now, triple-tapping the screen zooms in the displayed content. Use two-finger dragging to pan across the screen. Triple-tap the screen again to zoom out.
Starting the LEOMO App
Tap the LEOMO App icon.
LEOMO App icon
The LEOMO App starts.
Closing the LEOMO App
-
Swipe left from the right edge of the screen.
-
Point the home button and swipe it left.
-
Point the LEOMO App, and swipe it up.
The pill-shaped home button appears on the right of the screen.
The all currently running apps are shown.
The LEOMO App stops running background and disappears from the screen.
Installing the TYPE-S on a Bike
Attach a standard quarter turn bike mount to your bike’s stem or handlebar. Attach the TYPE-S to the Multi-sport Adapter, and attach the Bike Plate at the back of the Multi-sport Adapter as necessary.
Then, set them on the bike mount and twist 90 degrees to secure them to the bike.
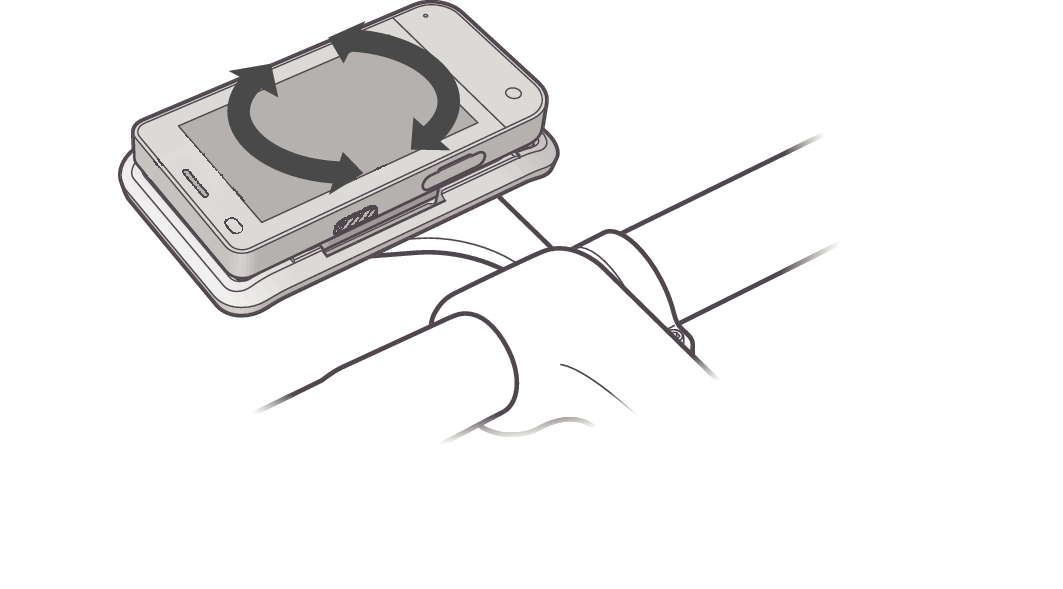
Attaching the TYPE-S to the Multi-sport Adapter or Optional Power Mount
Set the bottom of the TYPE-S on the Multi-sport Adapter or Power Mount ( ), then press its top until it clicks into place. (
 ) Make sure that the knob at the back has located the correct position and the TYPE-S is locked. (
 )
)
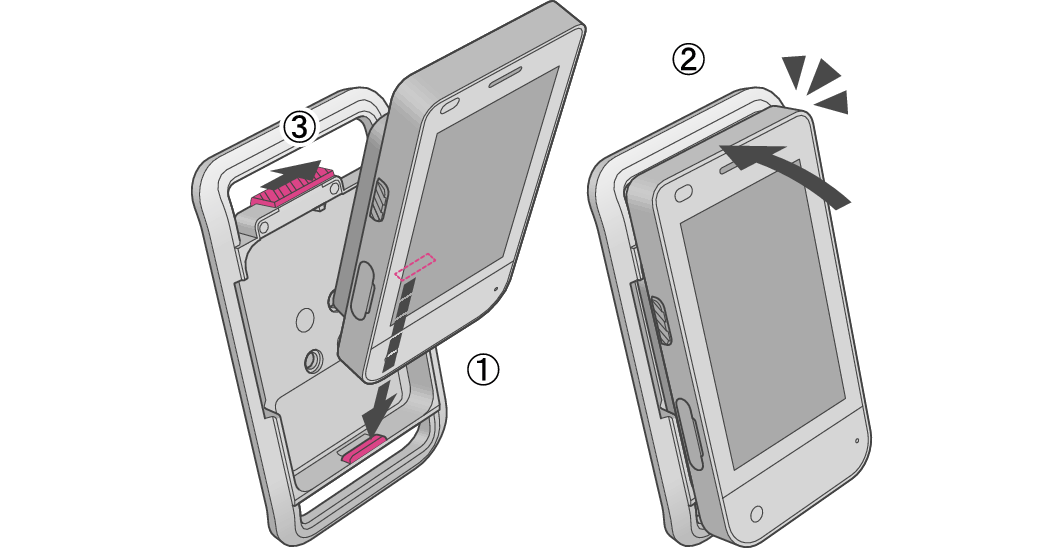
Multi-sport Adapter
Click!
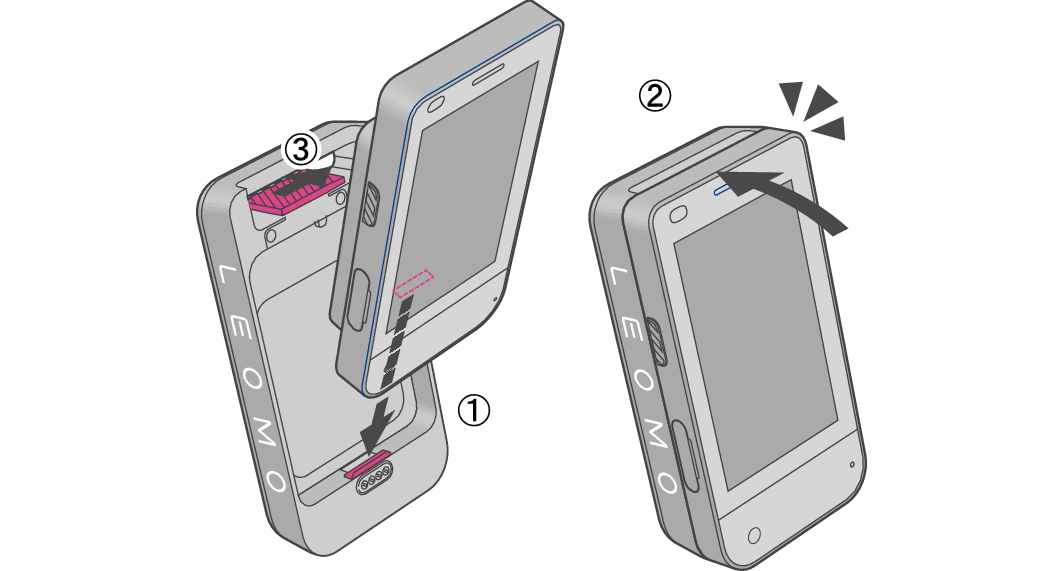
Power Mount
Click!
We recommend you to use a safety cord that ties Multi-sport Adapter to the bike’s stem or handlebar in case the Bike Plate or the bike mount breaks.
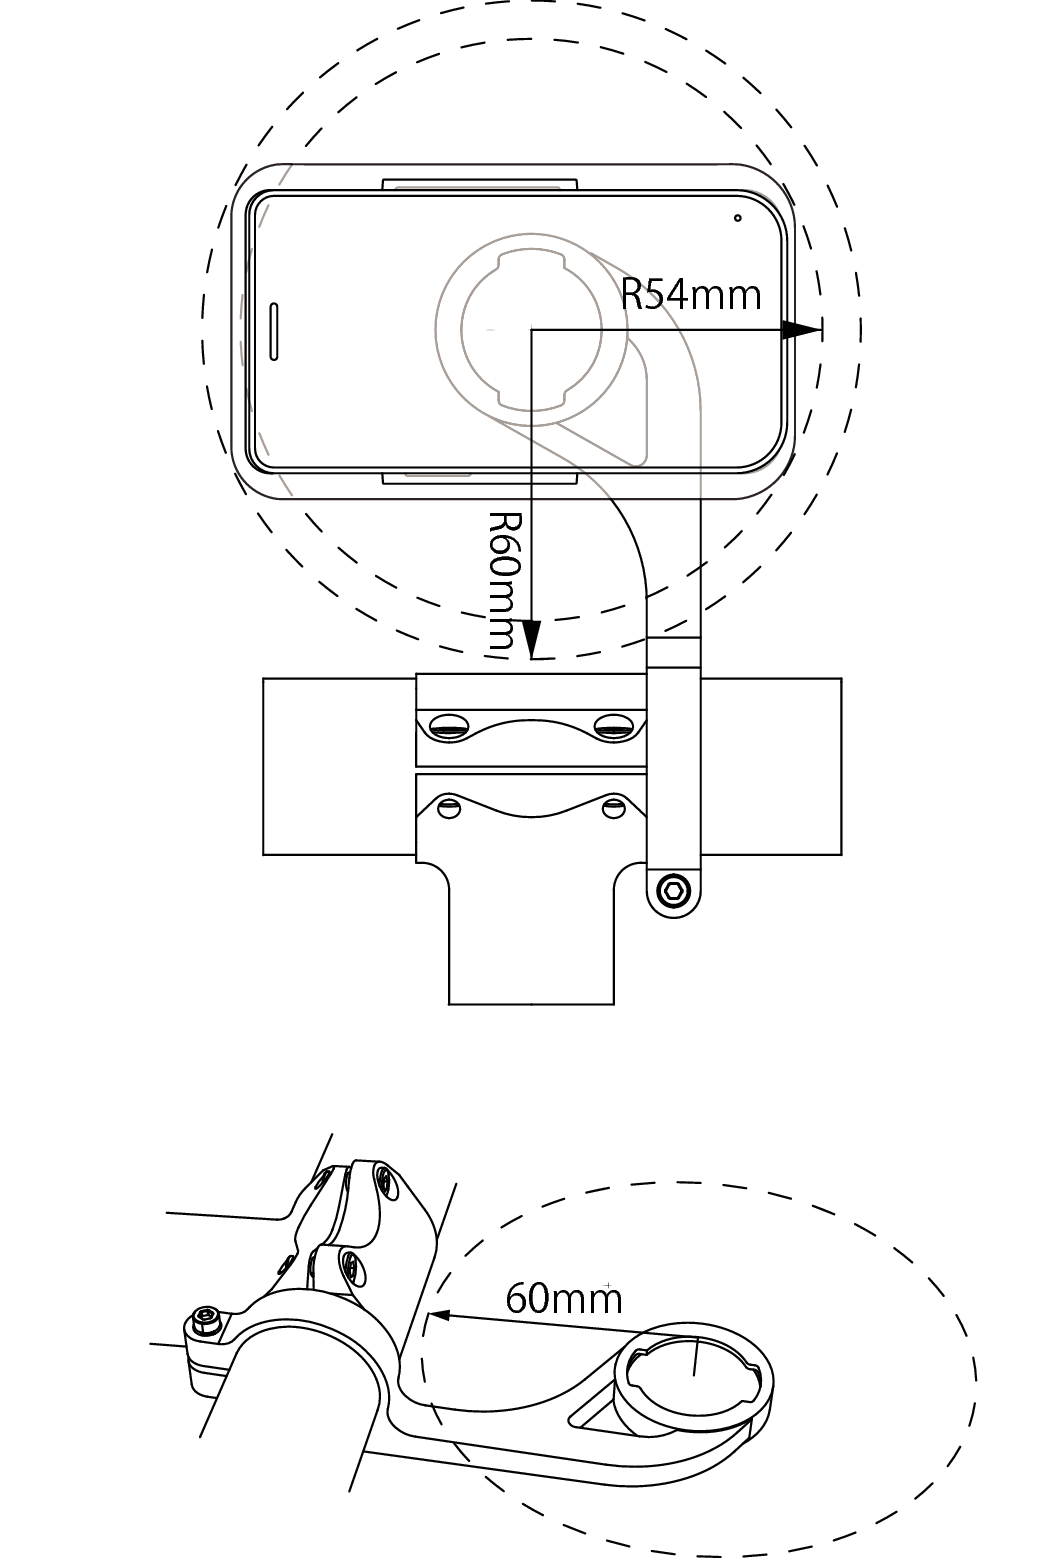
Use a standard quarter turn bike mount for a cycle computer having 3-inch or larger screen. The following figures show the required clearance.
WARNING
In order to maintain the product’s waterproof capabilities, please follow all instructions in this manual and the LEOMO terms of use listed below. Any damage resulting from user negligence will void the product warranty.
Make sure the nano SIM card/memory card tray of the TYPE-S is fully inserted.
Upon charging, make sure the USB Type-C ports and USB type-C cable are completely dry.
For more information, please go to https://leomo.io/warranty and https://leomo.io/terms
Detaching the TYPE-S from the Multi-sport Adapter or Power Mount
Unlock the knob at the back of the Multi-sport Adapter or Power Mount ( ), then detach the TYPE-S from it (
 ,
,  ).
).
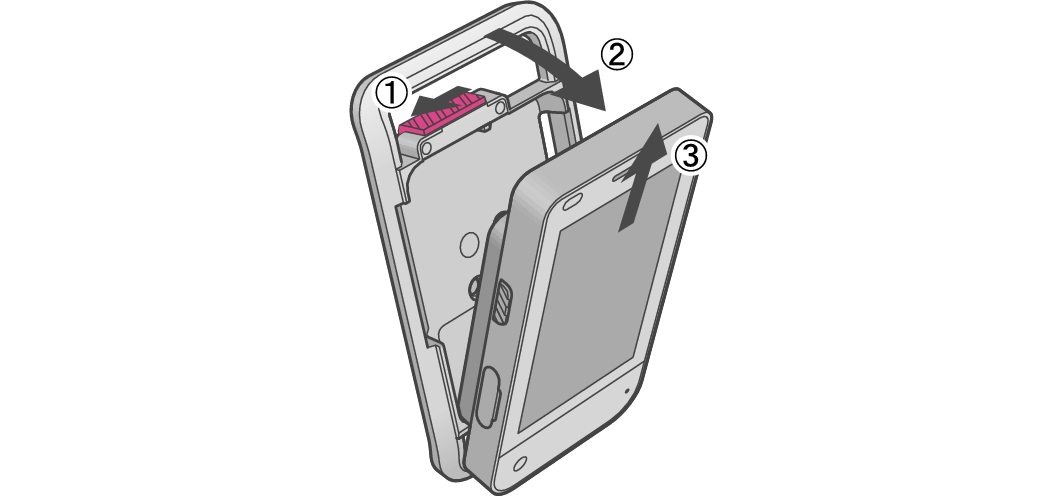
Multi-sport Adapter
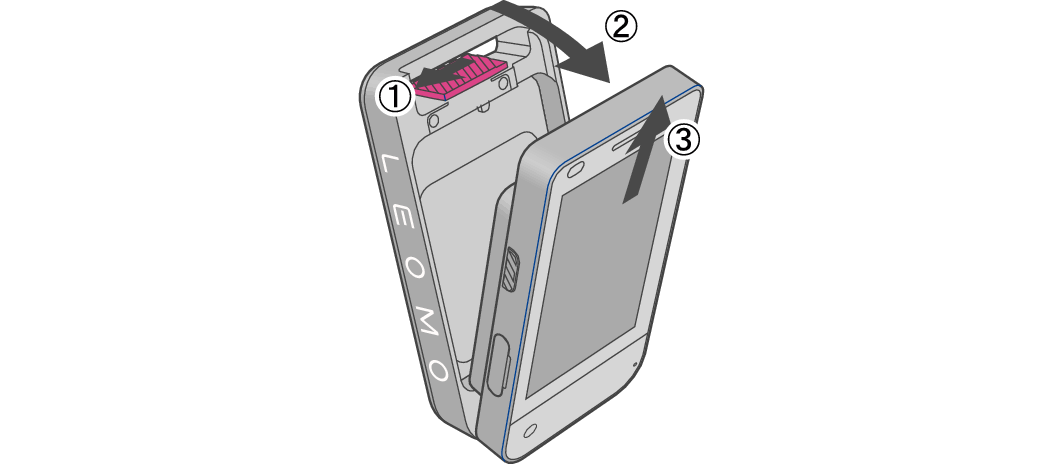
Power Mount
Using Optional Accessories
Using an Optional Soft Bumper
Attaching the TYPE-S to a Soft Bumper
Slide the upper edge of the TYPE-S under the hook of the Soft Bumper ( ), then press its bottom until it fits in the Soft Bumper. (
 )
)
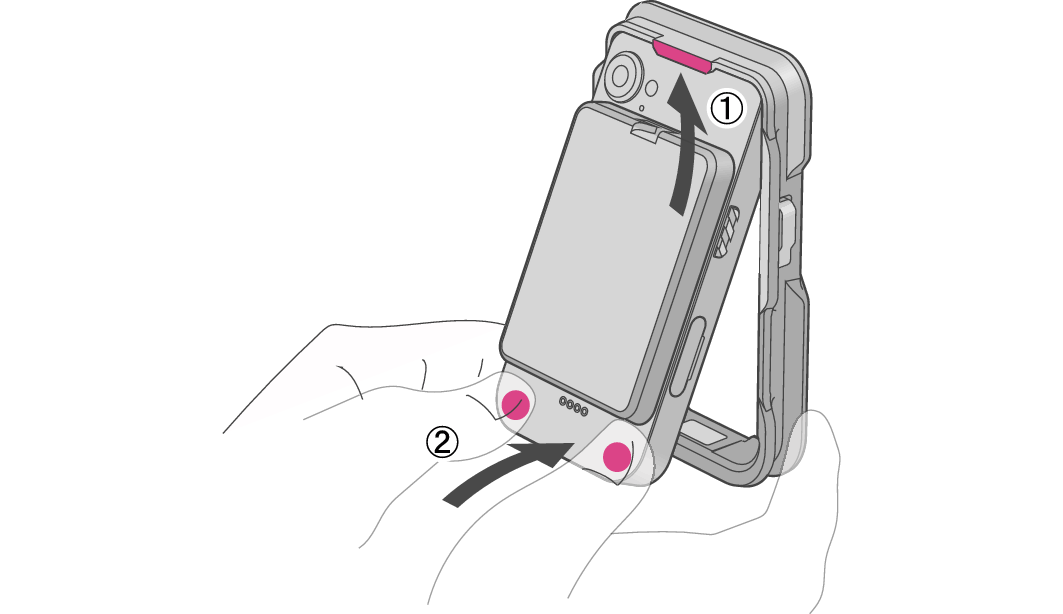
Detaching the TYPE-S from the Soft Bumper
Push the bottom of the TYPE-S out from the Soft Bumper as shown in the figure.
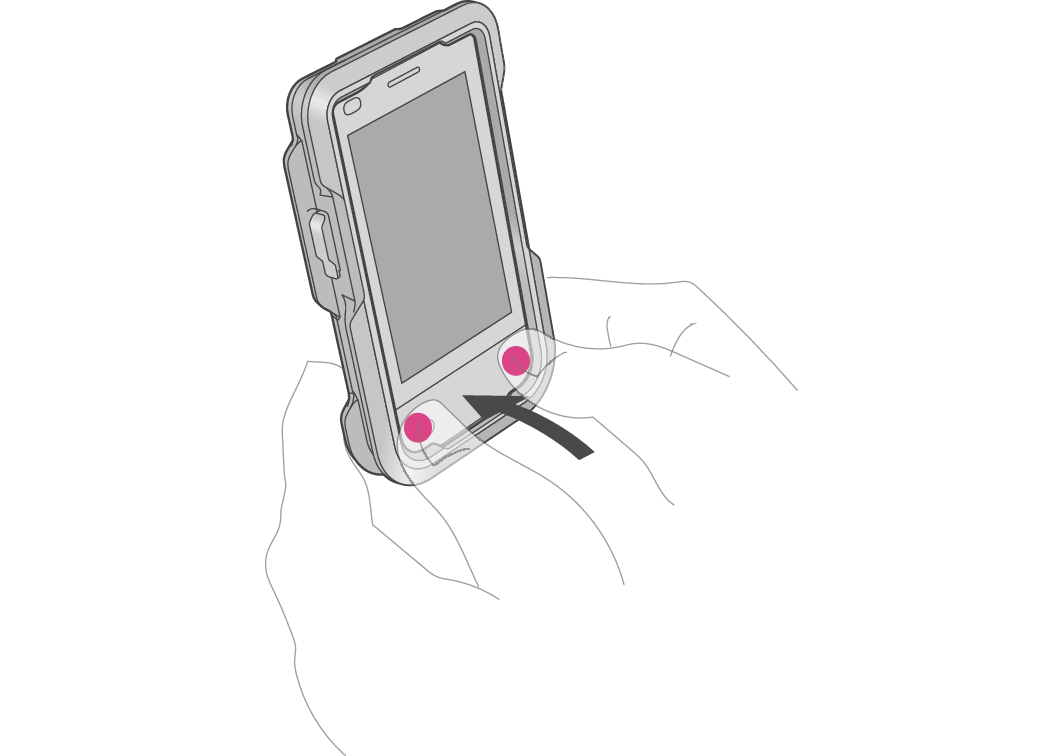
Using an Optional Metal Bumper
Attaching the TYPE-S to a Metal Bumper
Set the TYPE-S on the front frame ( ), and insert the two side keys (
 ). Then, place the back frame, and secure them all with the four M2-6 screws (
 ).
).
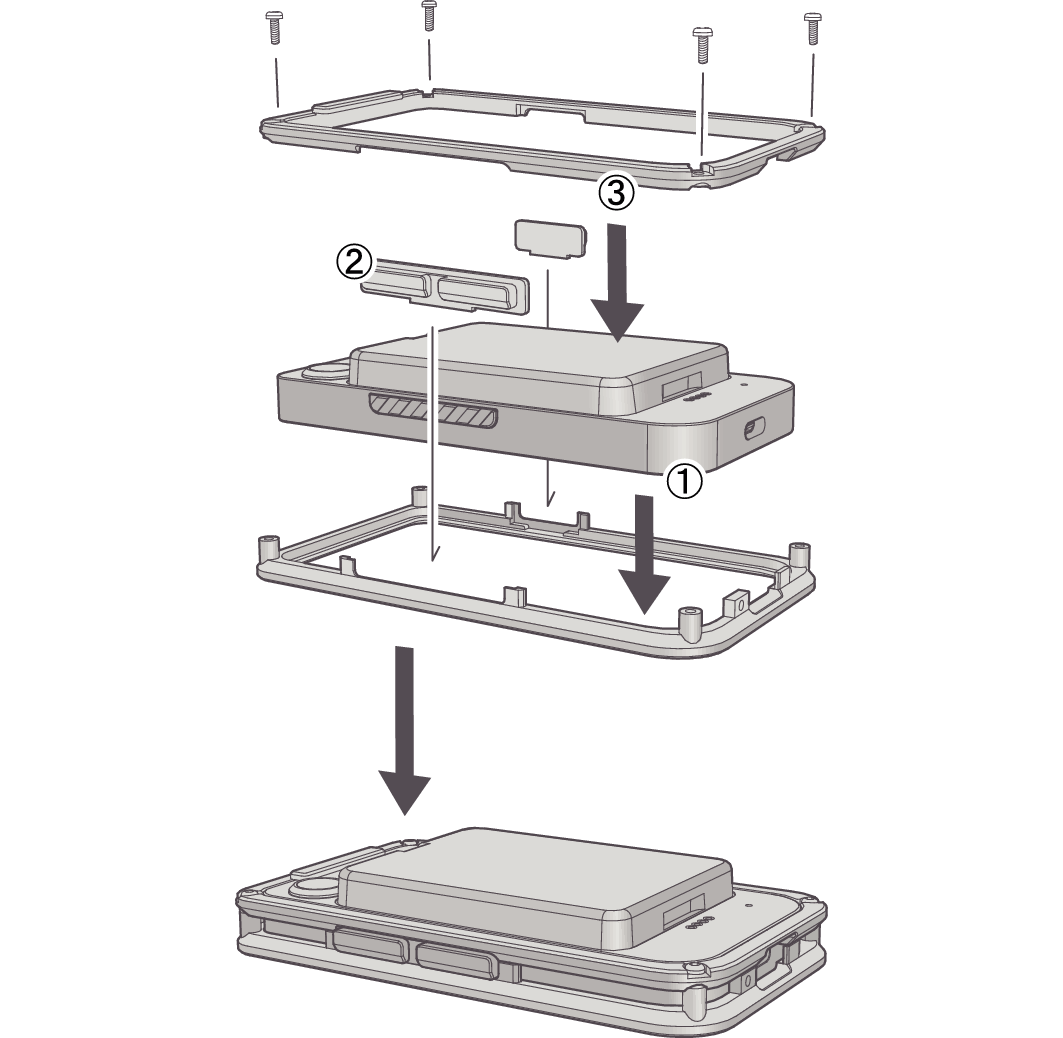
Screws M2-6 x 4
Back frame
Side keys
Front frame
Completed
Attaching the TYPE-S to the Multi-sport Adapter.
Fix the A Lock ( ) to the hook of the Metal Bumper using an M2-4 screw (
 ), then attach it onto the Multi-sport Adapter.
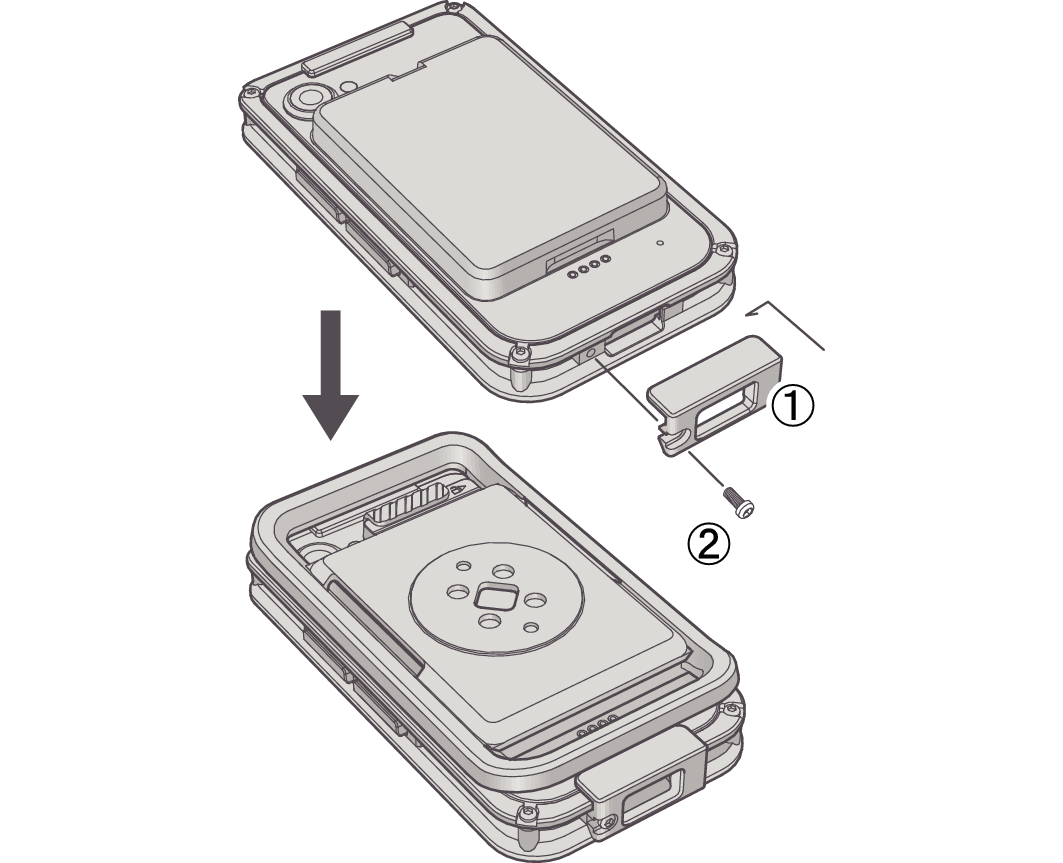
A Lock
Screw M2-4 x 1
Attaching the TYPE-S to an Optional Power Mount
Fix the P Lock ( ) to the hook of the Metal Bumper using an M2-4 screw (
 ), then attach it onto the Power Mount.
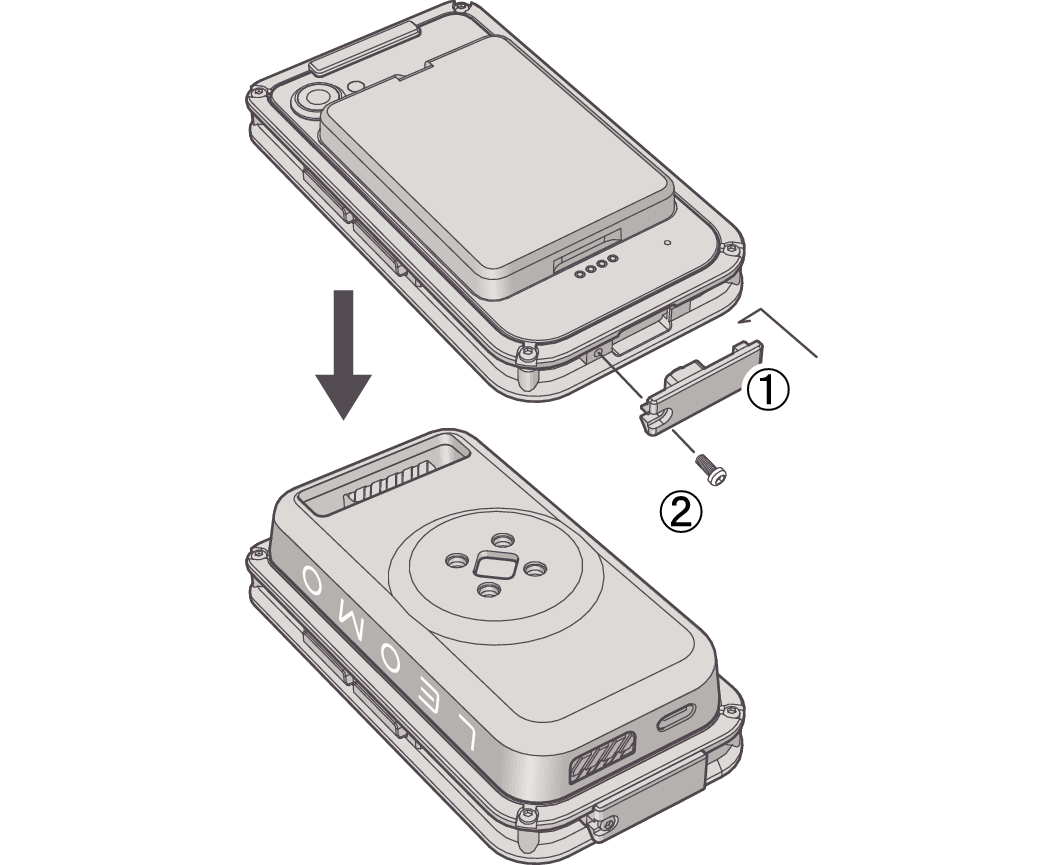
P Lock
Screw M2-4 x 1
Using an Optional Arm Band or Waist Belt
Attach an optional Arm Band or Waist Belt as shown in the following figures.
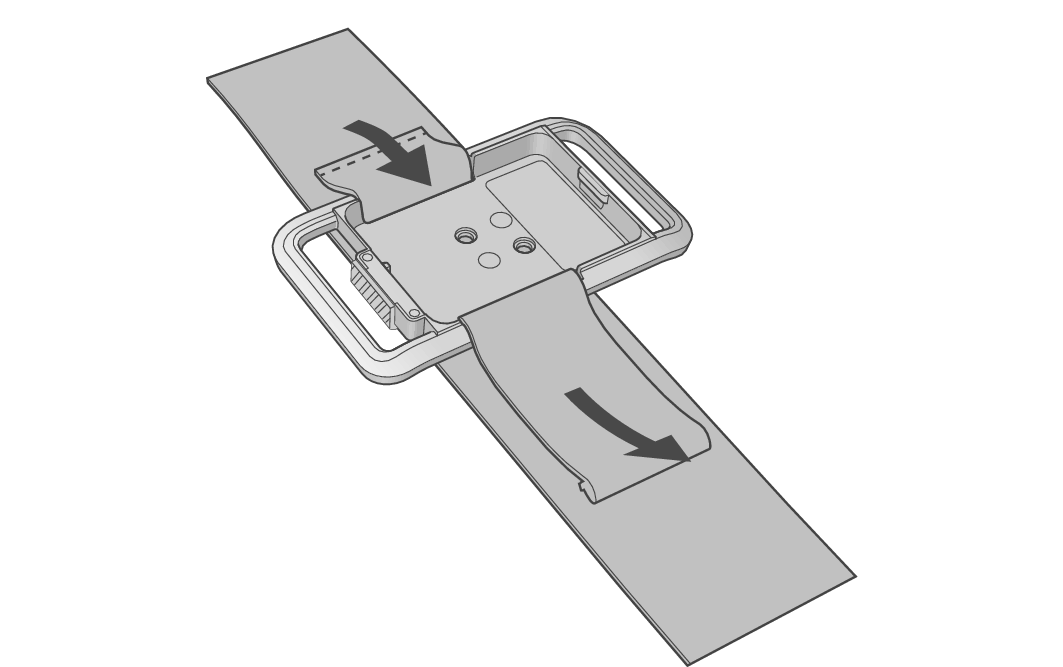
Arm Band
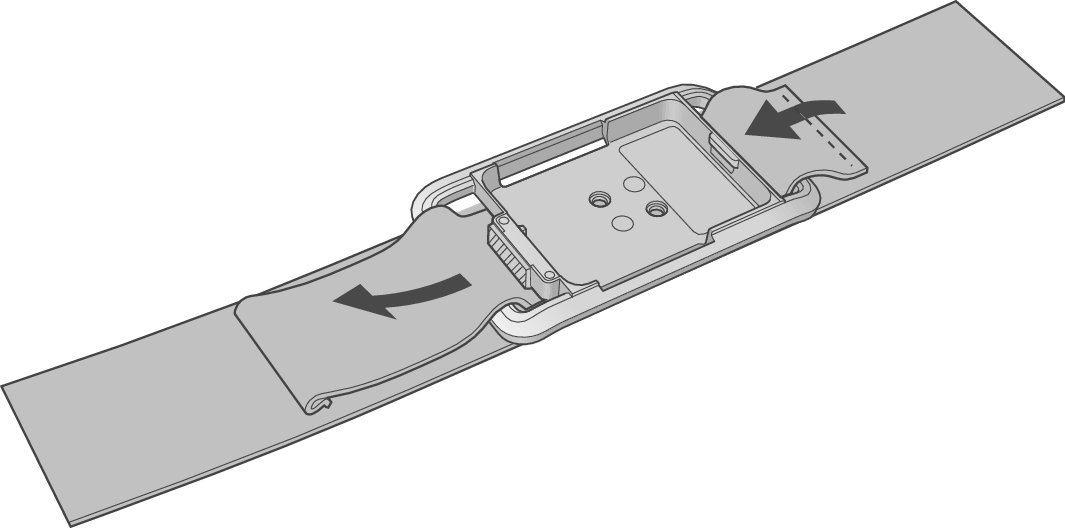
Waist Belt
