Basic Operations
Turning the LEOMO Motion Sensors On
To use the optional LEOMO Motion Sensors, turn on all five of them.
To turn on the LEOMO Motion Sensors, insert them into a plugged-in Sensor Charger, or remove the LEOMO Motion Sensors from the Sensor Charger after they are charged sufficiently. If the LEOMO Motion Sensors are inserted into an unplugged Sensor Charger or Sensor Carrier, they will be turned off.
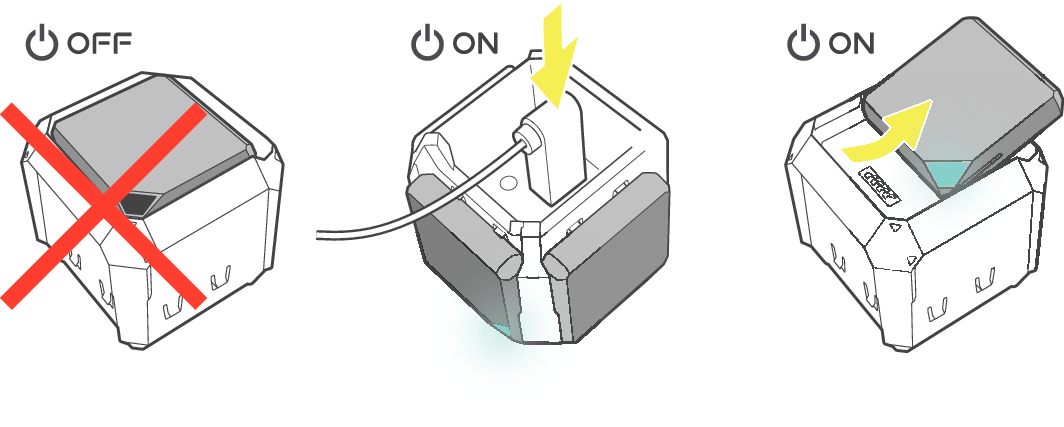
An AC adapter that outputs 5 VDC, 1.5 A or higher must be used for charging the LEOMO Motion Sensors.
Pairing the LEOMO Motion Sensors
Make sure your LEOMO Motion Sensors are paired and connected to your TYPE-S by checking the sensor connection status.
Manual Pairing
If you have a LEOMO Motion Sensor that has not yet been paired to your TYPE-S, you can manually pair it from Quick Menu (swipe up from the bottom of the screen) > Menu > Motion Sensors.
-
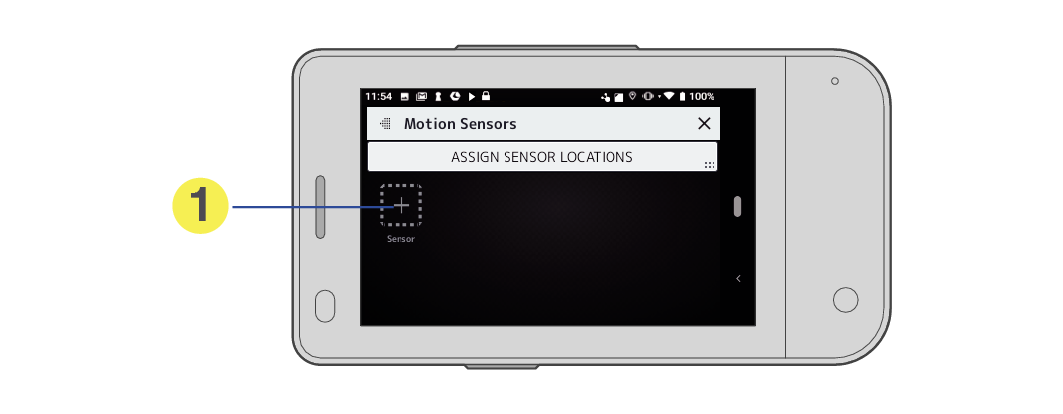
Tap a plus icon to pair a sensor to access the Add New Sensor screen.
-
Tap PAIR for the LEOMO Motion Sensor to be paired.
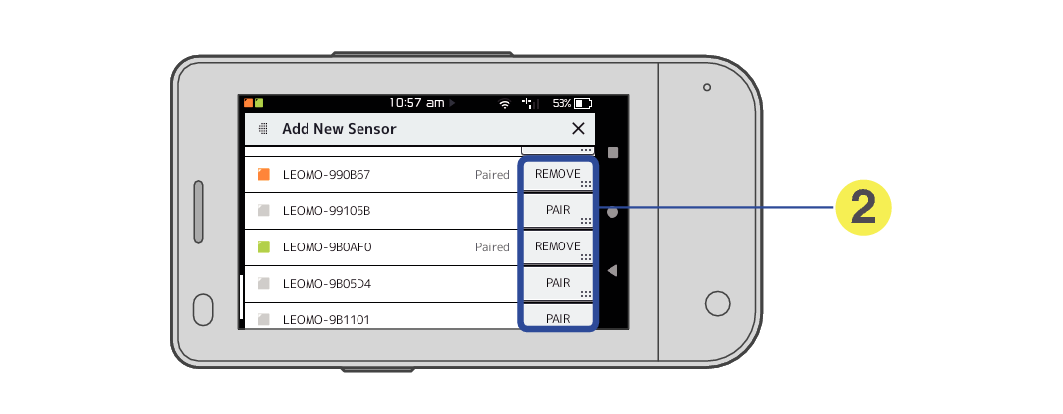
The Add New Sensor screen also allows you to remove (unpair) a LEOMO Motion Sensor from the TYPE-S.
Once the LEOMO Motion Sensors have been added, the Motion Sensors screen is shown as follows.
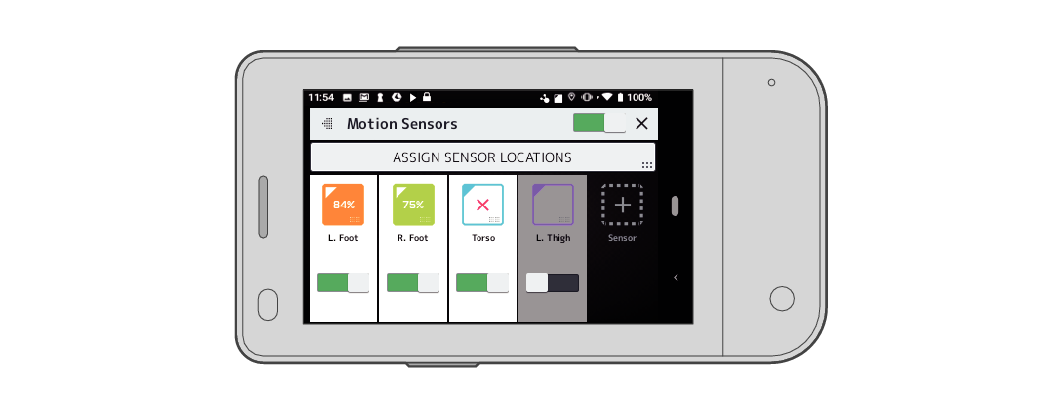
LEOMO Motion Sensor Status
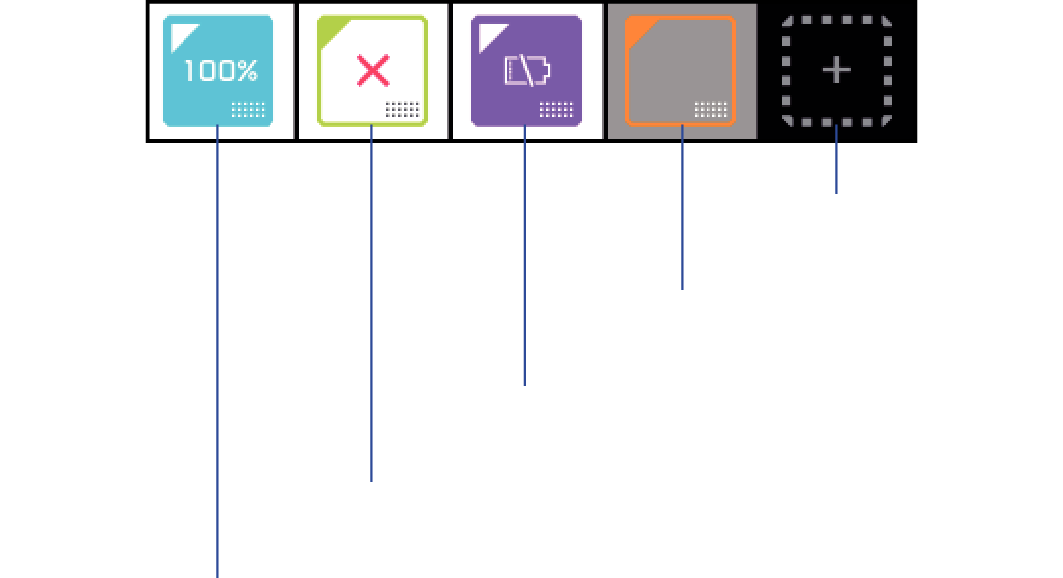
Connected/enabled/100% charged
Disconnected
Connected/enabled/not charged
Connected/disabled
Add sensor icon
The Motion Sensors screen can also be accessed by tapping the upper-center box, in which the icons of the LEOMO Motion Sensors are shown, of the Quick Menu.
If manually connecting a LEOMO Motion Sensor does not work, restart the sensor by inserting and removing it from the sensor charger.
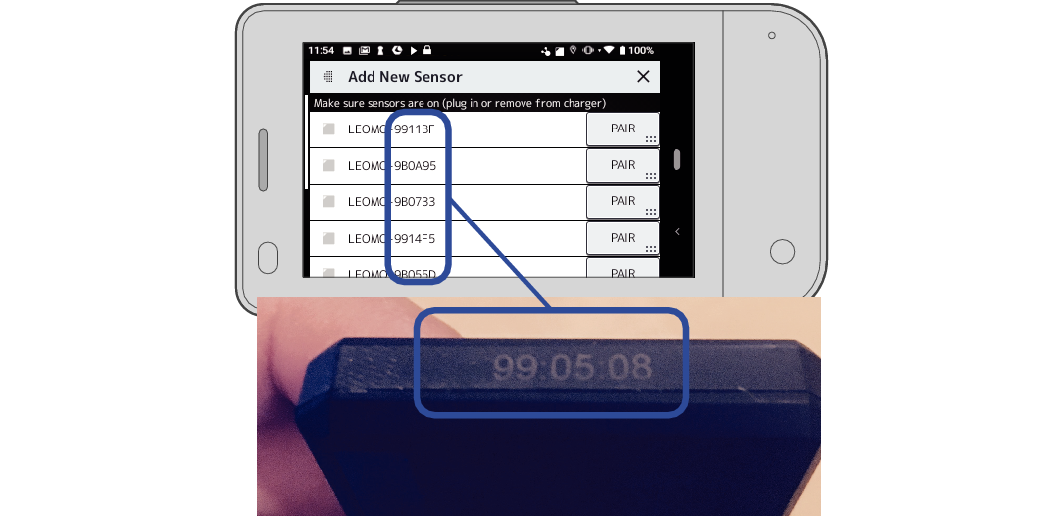
If you have more than five LEOMO Motion Sensors in your surroundings, pair to the correct sensor by checking the ID printed on the bottom of the sensor.
Enabling/Disabling the LEOMO Motion Sensors
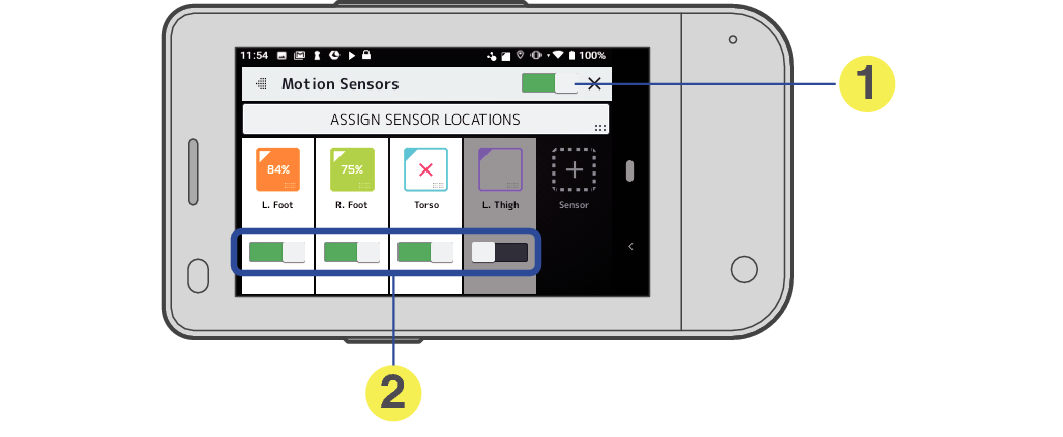
Each LEOMO Motion Sensor can be enabled/disabled from Quick Menu (swipe up from the bottom of the screen) > Menu > Motion Sensors.
-
Tap the switch to enable/disable all LEOMO Motion Sensors.
-
Tap the respective switches to enable/disable corresponding LEOMO Motion Sensors.
The Motion Sensors screen can also be accessed by tapping the upper-center box, in which the icons of the LEOMO Motion Sensors are shown, of the Quick Menu.
To remove a LEOMO Motion Sensor from the TYPE-S
-
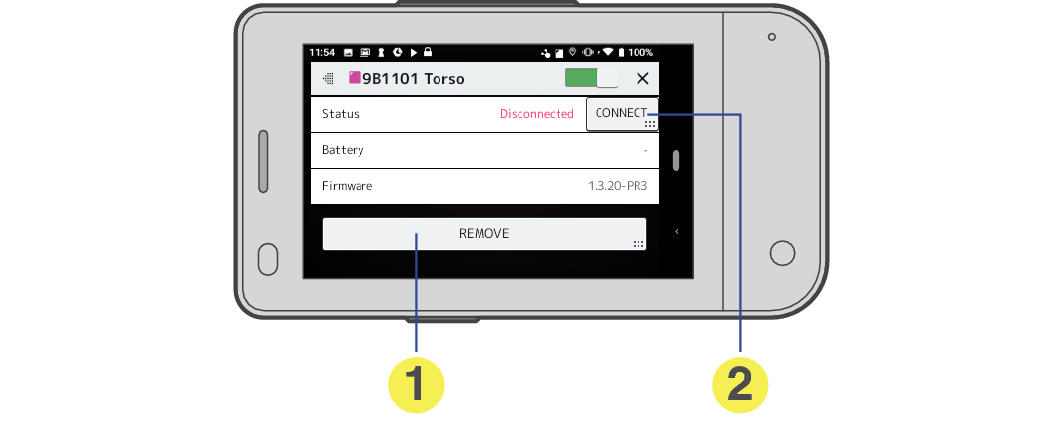
Tap the icon corresponding to the LEOMO Motion Sensor to be removed.
-
Paired Motion Sensors that are connected.
-
Tap the REMOVE button at the bottom to remove the corresponding LEOMO Motion Sensor.
-
Tap to remove the sensor from the TYPE-S.
-
This allows you to connect/disconnect the sensor to/from the TYPE-S manually.
-
Tap OK to remove the LEOMO Motion Sensor.
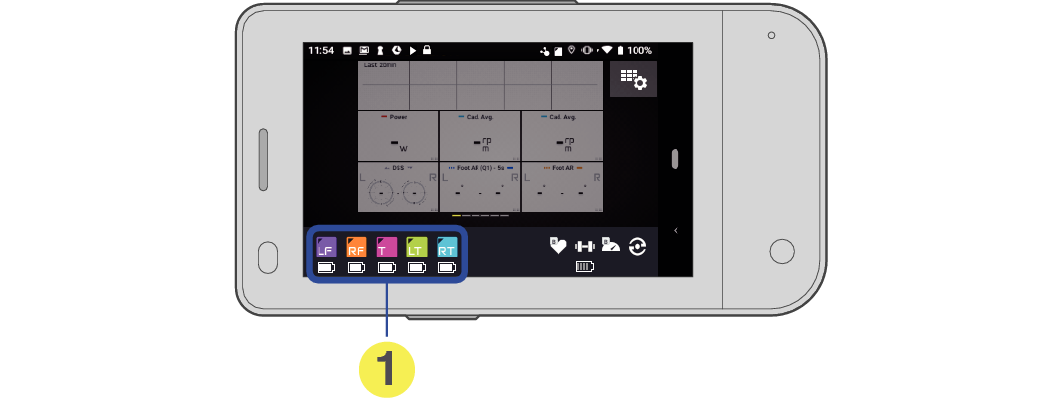
Tap the corresponding icon to see detailed information or to remove a LEOMO Motion Sensor.
A confirmation message appears.
Assigning the LEOMO Motion Sensor Locations
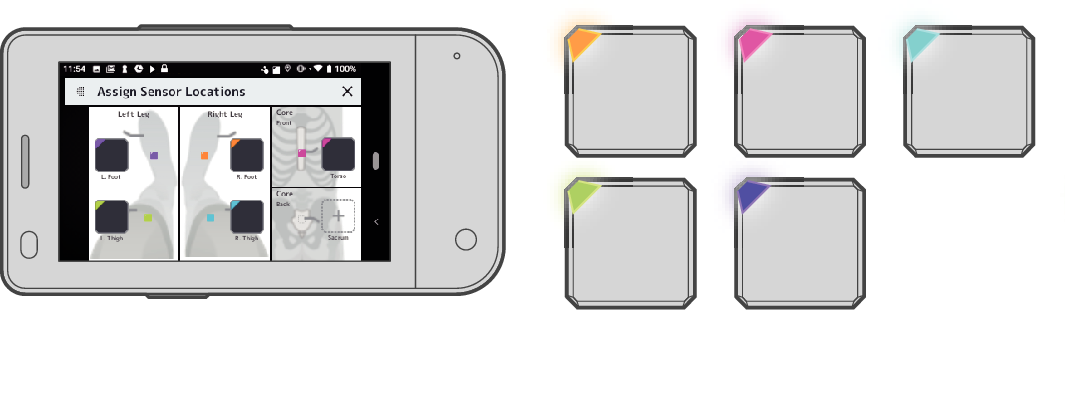
Assign LEOMO Motion Sensor locations.
LEOMO Motion Sensors need to be assigned to a specific body location. When prompted, set the locations of your LEOMO Motion Sensors (you can also manually access the location assignment page from Quick Menu > Menu > Motion Sensors > Assign Sensor Locations).
Pairing ANT+ Sensors
Pair ANT+ sensors, such as heart rate and cadence sensors from other companies, when you will use ones.
Optional: Pair ANT+ sensors from Quick Menu > Menu > ANT+ Sensors > Add New Sensor
Power Meter
Heart Rate Monitor
Speed Sensor
Cadence Sensor
Speed and Cadence Sensor
When ANT+ sensor connections are unstable, lowering the Bluetooth signal output level may improve connection status.
From the TYPE-S home screen, find and tap the Settings icon, and proceed to Connected devices > Connection preference > Bluetooth > Output Level, then select Output saver instead of Standard.
Wearing Your LEOMO Motion Sensors
Match your LEOMO Motion Sensor’s color to the assigned location on your body. For example, if you have assigned the orange sensor as the RT (right thigh) sensor, place the orange sensor on your right thigh.
The LEOMO App home screen shows what color is assigned to what location.
See LEOMO App Home Screen for details.
To change the assignment, go to Quick Menu > Menu > Motion Sensors > Assign Sensor Locations.
See Assigning the LEOMO Motion Sensor Locations for details.

Torso
Sacrum
Thighs
Feet
WARNING
Adhesives should always be used with all torso, sacrum, and thigh sensors. Failure to use adhesives could result in serious injury.
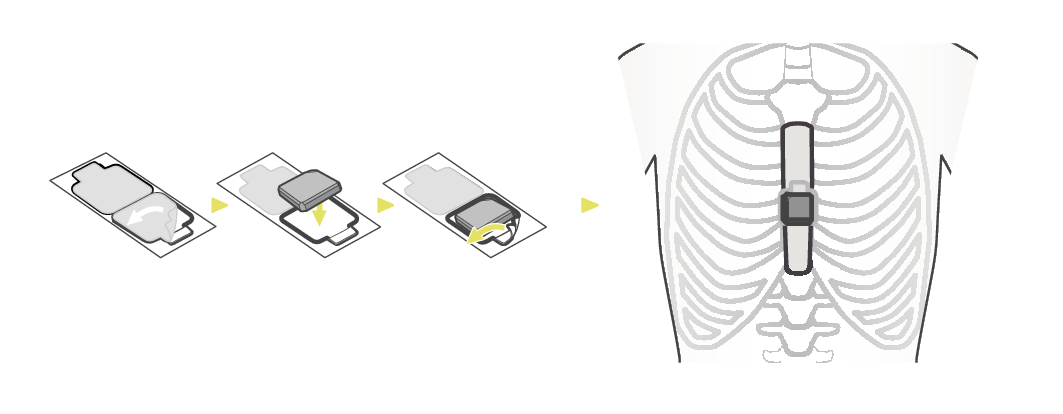
Torso (T)
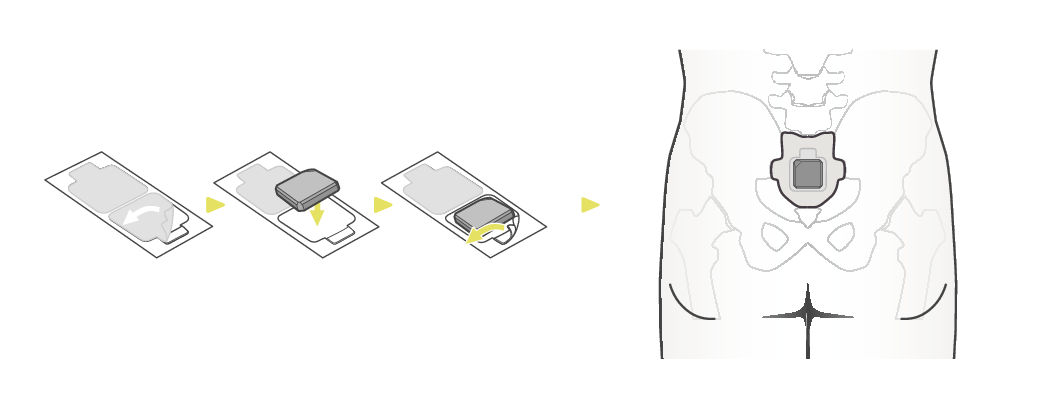
Sacrum (S)
The sacrum can be found right above the tailbone.
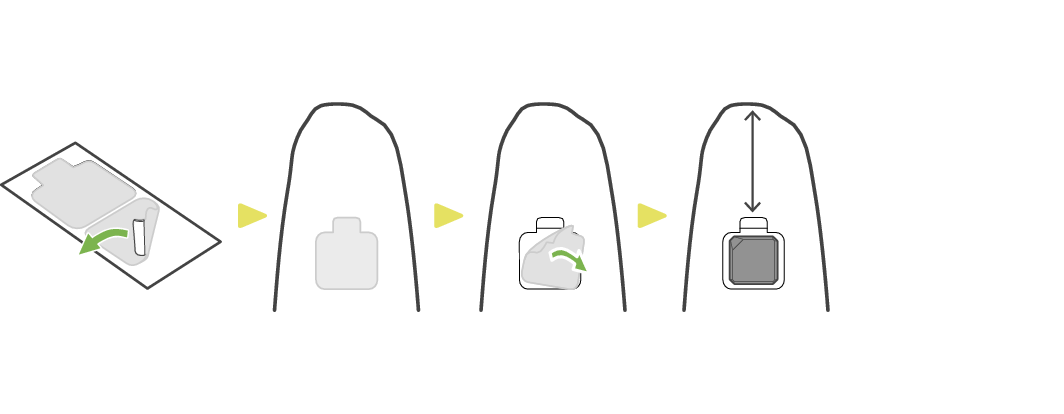
Thighs (RT and LT)
minimum 4” (10 cm)
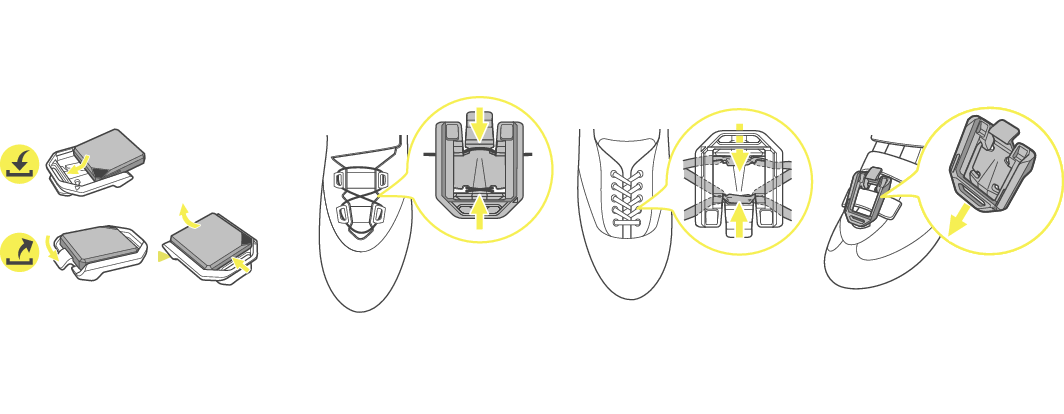
Feet (RF and LF)
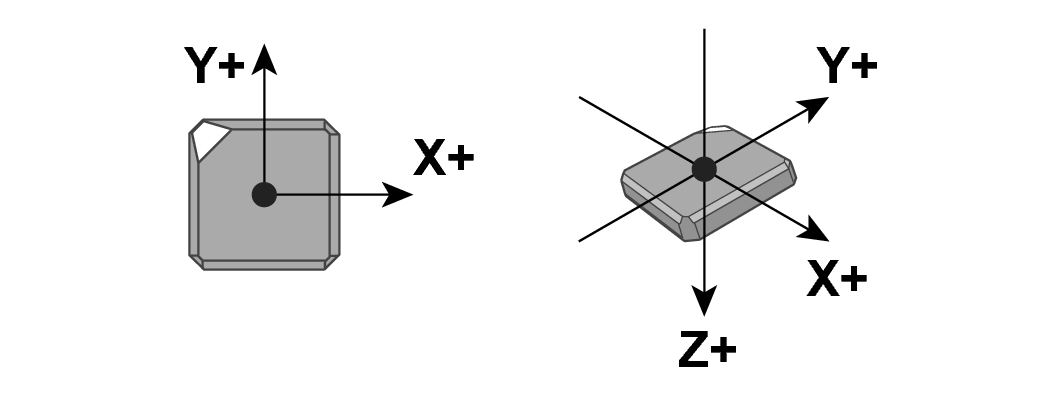
The following figures show the axes of the LEOMO Motion Sensors.
Hardware Controls for the LEOMO App
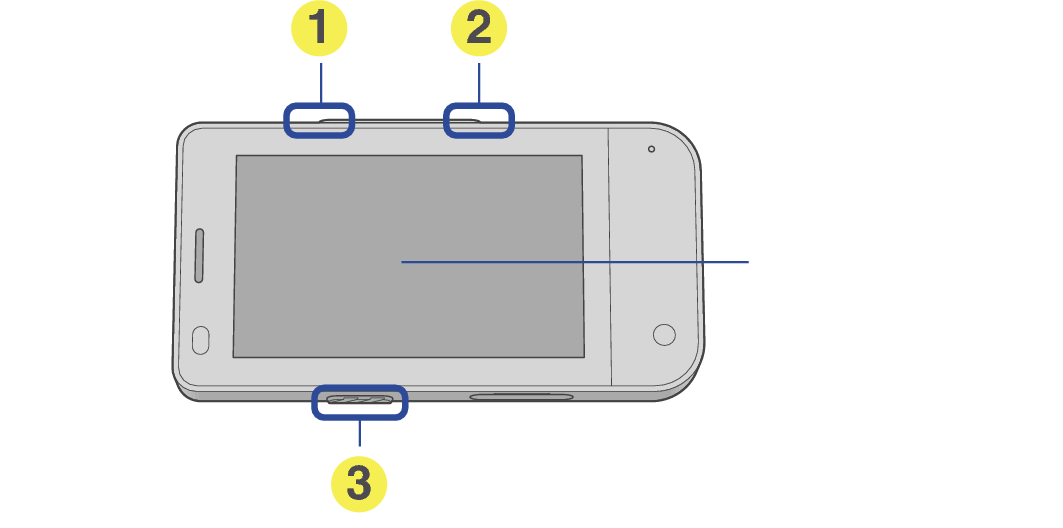
Touch display
-
Start/Pause button
-
Lap button / Screen Lock
-
Power key
Press to start/pause/resume activity.
Lap button
Press and release to mark lap (can only press once in a paused activity).
Screen lock
Press and hold for 2 seconds to lock the screen.
Press and hold again for 2 seconds to unlock the screen.
Press and hold for 2 seconds to turn on the TYPE-S.
Recording an Activity
-
Record an activity.
-
Upload an activity.
-
Analyze data on the web app.
Starting an activity
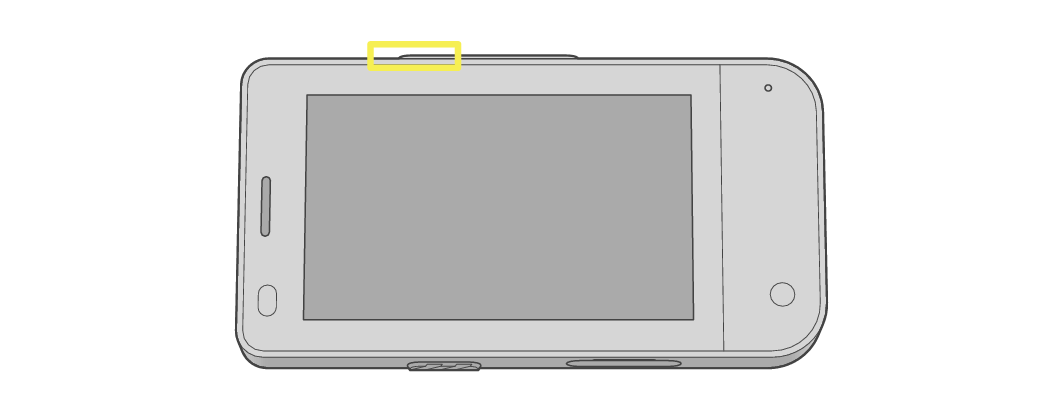
Start
During an activity
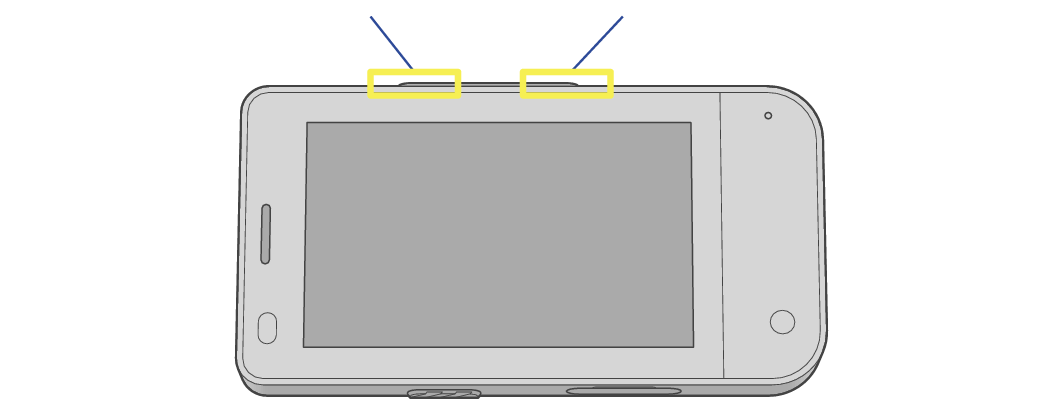
Pause/resume
Mark lap
Finishing an activity
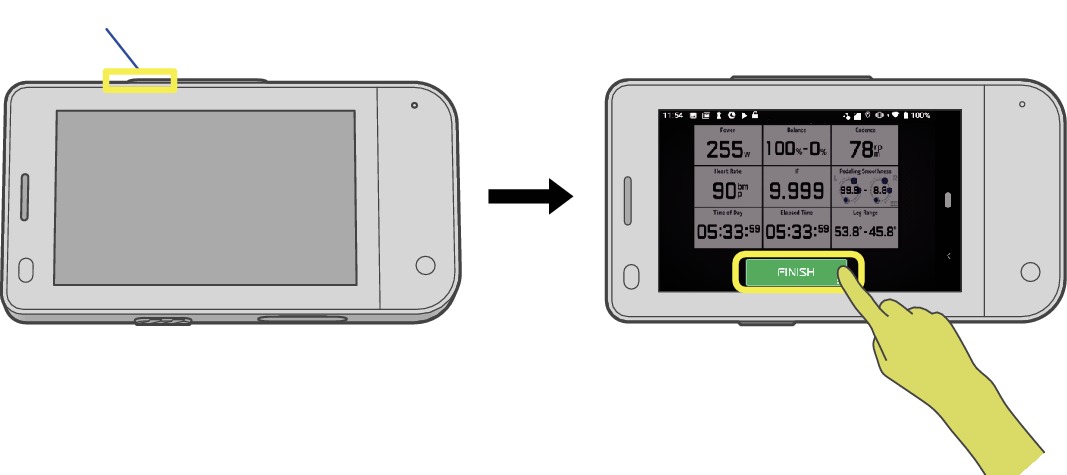
Pause
Upload your activities via Wi-Fi directly from the TYPE-S to the cloud from Quick Menu > Activity Log.
Note that the TYPE-S does not upload activities via Bluetooth or USB.
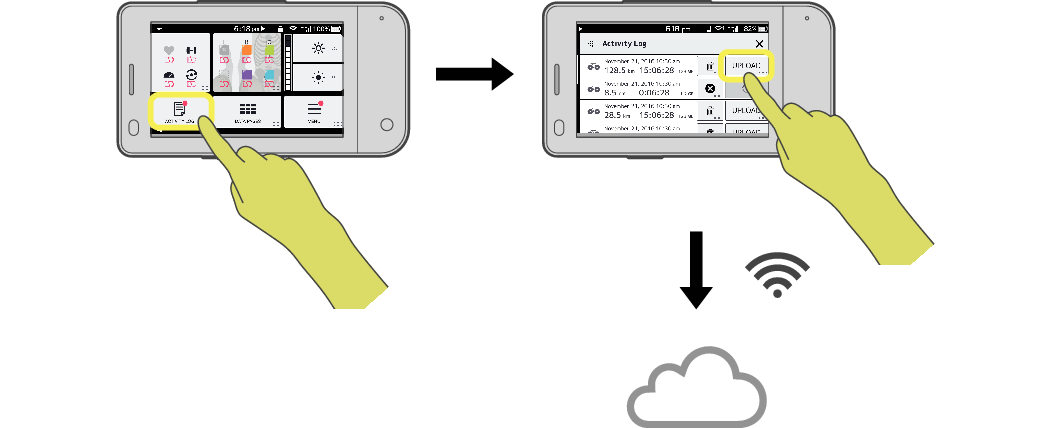
ACTIVITY LOG
UPLOAD

Customizing the LEOMO App
The LEOMO App has a MENU button for configurations and customization of the LEOMO App.
The MENU button is shown on the Quick Menu screen. Swipe up from the bottom of the screen to display the Quick Menu.
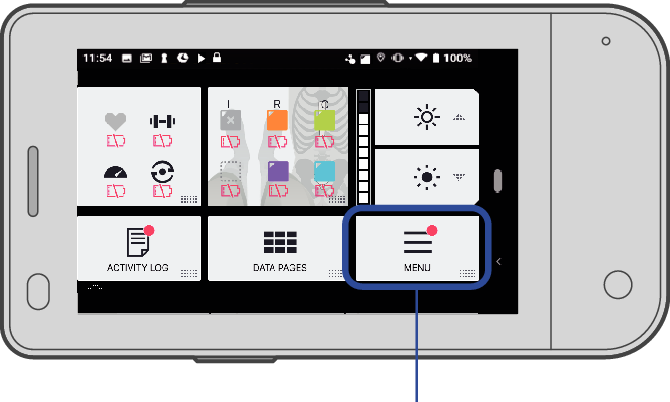
MENU
Configurations and customization related to the following items are enabled.
LEOMO Motion Sensors
ANT+ sensors
Data page layouts
FTP and power zones
Unit formats
Account information*
* You must have your LEOMO account when uploading your activities. It can be created in advance by tapping MENU > Account > Create LEOMO Account.
